Wednesday 30 November 2011

Martha's Pom Poms

So today I started. Our green garland is up on an exposed beam in the family/dining area and I have made three white pom poms to hang down.

You can find the full tutorial here, but if you just want to hang around here, here is how I did it:


A pack of tissue paper. Make sure there are 10 sheets per pack. I have noticed some selling packs of 5 sheets only, or 8 sheets (which will do also). I got mine from the Hot Dollar Shop (for the Sydney-siders) for only $1.


Lay out the pile of sheets from one pack so that the shortest end is facing you.


Make a fold that is about 2cm (or about 1 inch) in width.


Flip the pile of paper over and fold again.

 
You are creating accordion folds.


Once you have completed this, tie a piece of string in the middle. (I have also previously used thin wire).

Snip the ends to creat either an arch or point.


Fan out the folds.

Carefully and delicately separate each sheet of tissue paper. Though this is a quick process be aware that tissue paper does tear easily so be gentle with it.

First sheet on one side done.


One half done.


And the results...hooray Christmas is coming!
Thanks Martha!

Monday 28 November 2011

Christmas is Coming, the geese are getting fat

When I was about 7 Santa delivered an album of Christmas carols. I believe the vinyl might still be at my parents' place. One of the carols on there I had never heard of at the time, but oddly enough, it is the one song that has stuck in my head the most. Apparently it is a nursery rhyme too. It goes:
Christmas is coming, the geese are getting fat
Please put a penny in the old man's hat
If you haven't got a penny, a ha'penny will do
If you haven't got a ha'penny, then God bless you!
Well folks, Christmas is coming. I planned to start planning about 4 weeks ago, but time doesn't stand still, and I have not gotten to it yet. So, I shall start planning now. Beyond the basic Christmas things that need to be done (presents bought and wrapped, cards written and sent, etc) I am trying to improve on my ability to make the season festive and magical.

I want to make sure Christmas is magical. I have the standard traditional things that we do (milk and cookies for Santa, glitter dust for where he and the reindeer have been), and there are some things I am just not into but others do so well (Christmas lights - not on the agenda yet).

Decoration-wise this is my inspiration:

Lots of paper chains and paper snowflakes, but I love the effect. For those who haven't figured it out it is from the movie "Elf", a totally hilarious Christmas movie. We've already started watching it this Christmas season.

So to get started I will be doing the following:

1. White tissue paper pom poms (for instructions visit Martha Steward here) but I will be posting mine tomorrow.

Picture source found here
2. Paper snowflakes:

Image removed
3. A paper star which I plan to go on the top of my Christmas Card tree (instructions in a few days)
From cut out and keep here
4. And few more items for inspiration:
From Home By Linn (in Norwegian but there are pictures or you can click the google translate button)


...and just because I love doilies so much... this is from the happy home blog.


Fingers crossed I get my rear end into gear and get this done. Stay posted...

Thursday 24 November 2011

Got some bowls and mugs lying about?

I had some white bowls and mugs lying around I have been wanting to decorate, and finally discovered this pen:


I bought it from Eckersleys for about $10. I got black but there are other colours. One of the first projects I did was to make some personalised mugs for a couple of friends. We were celebrating 21 years of friendship, so I got this friendship poem (first seen on Fat Mum Slim here), I printed it out, traced it onto baking paper, coloured the back with lead pencil, retraced onto the mug, and then went over it with the "Porcelaine" pen. You could freehand but I just don't have the confidence. Leave it to dry for 24 hours then bake for 35 minutes. All done.


I also did a couple of bowls for icecream. One is a Dr Seuss quote - and if I had the capability I would have done it in a Dr Seuss font. But I don't - not yet. The other is a quote from John Keats' 'Ode on a Grecian Urn'. He's my favourite poet.


I did try and monogram a piggy bank for my son, but failed:


I'm sure it would have looked good , if I hadn't broken it.

I might get some red and green and decorate for Christmas.

Magi

Be sure to visit our creative spaces for other great creative ideas this Thursday.

Monday 21 November 2011

She who dies with the most fabric wins

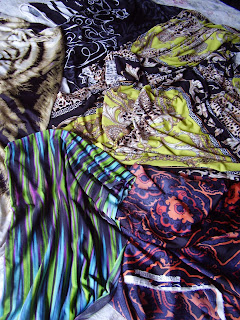
Ever heard of the saying, "she who dies with the most fabric wins." Well, I am not a winner yet, but I am certainly in the competition. I just can't help myself sometimes. If I see fabric I like, whether for print or feel or both, I love to have it. Often with no plan in mind as to what I will create out of it.

I have my favourite fabric haunts and am grateful that some are close to home. I am grateful too that the one close to home has a box of toys to keep children busy while mums are shopping. It is as if they knew what I needed. Master Three loves to visit almost as much as I do.

I recently had the good fortune of purchasing some GORGEOUS fabric by the designer Charlie Brown. I have always loved her designs (honestly, how beautiful are they, and for more than just skinny minnie body types too). Her jersey fabrics are spectacular. I was so excited it was hard to maintain restraint in my purchases. And now that I have them I am almost too sad to bring scissors to them. I just want to drape them all over me. Really, that's how gorgeous this fabric is.

Well, I have obviously gushed enough. I will have to produce some kiddy frocks from this stash, but will just sit and admire them as they are for just a few days more.

Can't wait to make something with this one. Won't a dress out of this with aqua sandals look great?

Tuesday 1 November 2011

Happy Halloween

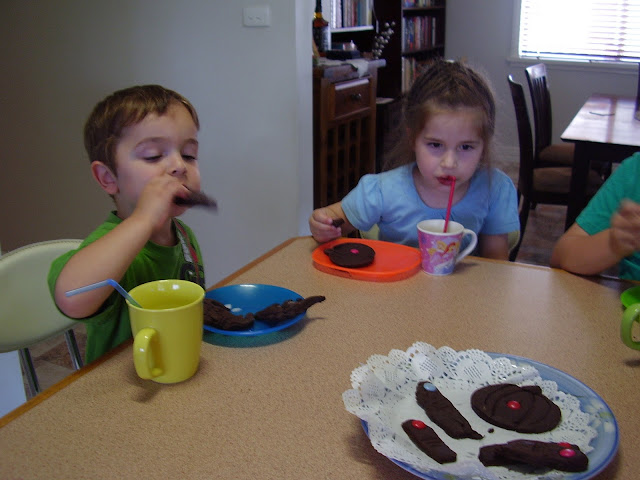
No trick or treating for us this year but I did manage to bake some Halloween biscuits (albeit very last minute).

I used Martha Stewart's recipe (found here). I have reprinted below with my changes in red.

Ingredients

  • 1 1/2 cups plain flour 
  • 3/4 cup unsweetened cocoa powder
  • 1/2 teaspoon salt
  • 3/4 cup (1 1/2 sticks) (170g) unsalted butter, room temperature
  • 1 cup sugar
  • 1 large egg
  • Small candies or sprinkles, for decorating (optional) (smarties)
  • 1 teaspoon vanilla essence

Directions

  1. Preheat oven to 350 degrees (190 degrees celsius - I did fan forced). In a medium bowl, whisk together flour, cocoa, and salt; set aside.
  2. In a large bowl, with an electric mixer, beat butter and sugar until light and fluffy; beat in egg. On low speed, mix in flour mixture. Divide dough in half, and form into 2 disks, each about 3/4 inch thick. Wrap disks in plastic; chill until firm, at least 45 minutes and up to 2 days. (I didn't have 45 minutes so I did 10 minutes in the freezer).
  3. On a lightly floured sheet of waxed paper, using a floured rolling pin, roll dough 1/2 inch thick. (If dough becomes too soft to work with, refrigerate for a few minutes.)
  4. Using 2- to 3-inch Halloween cookie cutters, cut out shapes, dipping cutters in flour as necessary to prevent sticking; place on a baking sheet, spacing them 1 inch apart.
  5. Bake until surface is dry to the touch, 10 to 15 minutes (if decorating, press candies into dough halfway through baking). Cool cookies 1 to 2 minutes on baking sheet; transfer to a rack to cool completely.

And this is the result:

And this was a happy afternoon tea:


And here was my Halloween in 1986 (I am the hunchback):


Hope you all had a Happy Halloween.